Set up a Temporal Application project - Java SDK dev guide
This section covers how to use a terminal, a code editor, and a development Cluster to create a Namespace, write a single Activity Workflow, run a Worker that talks to your development Cluster, run a Workflow using the CLI, add a testing framework, and view Workflows in the Web UI.
This section of the Temporal Java SDK developer's guide covers the minimum set of concepts and implementation details needed to build and run a Temporal Application using Java.
By the end of this section you will know how to construct a new Temporal Application project.
There are three ways to follow this guide:
Read more in the Choose a development Cluster section on this page.
Install the Temporal CLI
How to download and install the Temporal CLI
The Temporal CLI is available on MacOS, Windows, and Linux.
MacOS
How to install the Temporal CLI on Mac OS
Choose one of the following install methods to install the Temporal CLI on MacOS:
Install the Temporal CLI with Homebrew
brew install temporal
Install the Temporal CLI with cURL
curl -sSf https://temporal.download/cli.sh | sh
Install the Temporal CLI from CDN
- Select the platform and architecture needed.
- Download for Darwin amd64: https://temporal.download/cli/archive/latest?platform=darwin&arch=amd64
- Download for Darwin arm64: https://temporal.download/cli/archive/latest?platform=darwin&arch=arm64
-
Extract the downloaded archive.
-
Add the
temporalbinary to your PATH.
Linux
How to install the Temporal CLI on Linux
Choose one of the following install methods to install the Temporal CLI on Linux:
Install the Temporal CLI with cURL
curl -sSf https://temporal.download/cli.sh | sh
Install the Temporal CLI from CDN
- Select the platform and architecture needed.
- Download for Linux amd64: https://temporal.download/cli/archive/latest?platform=linux&arch=amd64
- Download for Linux arm64: https://temporal.download/cli/archive/latest?platform=linux&arch=arm64
-
Extract the downloaded archive.
-
Add the
temporalbinary to your PATH.
Windows
How to install the Temporal CLI on Windows
Follow these instructions to install the Temporal CLI on Windows:
Install the Temporal CLI from CDN
- Select the platform and architecture needed and download the binary.
- Download for Windows amd64: https://temporal.download/cli/archive/latest?platform=windows&arch=amd64
- Download for Windows arm64: https://temporal.download/cli/archive/latest?platform=windows&arch=arm64
-
Extract the downloaded archive.
-
Add the
temporal.exebinary to your PATH.
Choose a development Cluster
Which development Cluster should you choose?
We recommend choosing a development environment based on your requirements.
The source code for the Temporal Server (the orchestrating component of the Temporal Cluster) is licensed under the MIT open source license. So, in theory, anyone can take the Temporal Server code and run their Temporal Platform in any number of creative ways.
However, for most developers we recommend starting by choosing one of the following:
Keep in mind that in every scenario, the “Temporal Platform” does not host and run your Workers (application code). It is up to you, the developer, to host your application code. The Temporal Platform ensures that properly written code durably executes in the face of platform-level failures.
Local dev server
When to use a local development server?
We recommend using the local development server if you are new to Temporal, or want to start something from scratch and don’t have a self-hosted environment ready or want to pay for a Temporal Cloud account.
The Temporal CLI comes bundled with a development server and provides a fast way to start running Temporal Applications.
However, the local development server does not emit any metrics. If you are eager to to set up Cluster-level metrics for performance tuning, we recommend using a self-hosted Cluster or Temporal Cloud.
Start the dev server
How to start a local development server
If you have successfully installed the Temporal CLI, open a new terminal and run the following command:
temporal server start-dev
This command automatically starts the Temporal Web UI, creates a default Namespace, and creates an in-memory database.
The Temporal Web UI serves to http://localhost:8233.
For more command details and options, see the CLI reference
Create a custom Namespace
How to create a Namespace on the development server
The development server does automatically create a default Namespace (named "default") when it starts up. However, you will create a custom one for our application. Since this is something recommended at a production level, it's recommend practicing it with the development server.
Use the temporal operator namespace create command using the Temporal CLI to create a Namespace on the development server.
temporal operator namespace create backgroundcheck_namespace
For command details and options, see the CLI reference.
Temporal Cloud
When to use Temporal Cloud
If you do not have a Temporal Cloud Account, you can request one using the link on the Get started with Temporal Cloud guide.
We recommend starting off with Temporal Cloud if you already have a production use case, or need to move a scalable proof of concept into production.
In other words, Temporal Cloud is perfect if you are ready to run at scale and don’t want the overhead of managing your own self-hosted Cluster.
To create a Namespace in Temporal Cloud, follow the instructions in How to create a Namespace.
Store certificates and private keys generated for your Namespace as files or environment variables in your project. You need access to your certificate and key to run your Workers and start Workflows.
For more information on certificate requirements, see How to manage certificates in Temporal Cloud.
Self-hosted Temporal Cluster
We recommend using a self-hosted environment if you are starting something new and need to scale with production-level features, but don’t yet need or want to pay for Temporal Cloud.
For example, running a self-hosted Cluster lets you try different databases, view Cluster metrics, use custom Search Attributes, and even play with the Archival feature.
For the purposes of this guide, we show how to use a self-hosted environment that runs completely out of Docker. We acknowledge that it takes a fair amount of experience to elevate from a self-hosted environment in Docker to something that can run at an enterprise production scale. The self-hosted information in this guide should help you make more informed decisions.
To follow along with self-hosted parts of this guide, install the following:
Then, clone the temporalio/docker-compose repository.
Change directory into the root of the project.
Run the docker compose up command.
git clone https://github.com/temporalio/docker-compose.git
cd  docker-compose
docker compose up
Create a command alias for the Temporal CLI:
alias temporal_docker="docker exec temporal-admin-tools temporal"
Create a Namespace.
temporal_docker operator namespace create backgroundcheck_namespace
Boilerplate Temporal Application project code
What is the minimum code I need to create a boilerplate Temporal Application?
Let’s start with a single Activity Workflow and register those functions with a Worker.
After we get the Worker running and have started a Workflow Execution, we will add a testing framework.
Project structure
You can organize Temporal Application code to suit various needs in a way that aligns with the idiomatic style of the language you are working in. This includes structuring your files according to your organization's best practices.
However, there are some general ways to think about organizing code.
The best practice is to group Workflows together, Activities together, and separate your Worker process into a standalone file. Often this happens respectively per use case, business process, or domain.
For monorepo-style organizational techniques, consider a designated Workflow directory for each use case and place each Workflow in its own file, but also maintain a dedicated place for shared Activities.
For example, your project structure could look like this (the upper sections of the package structure, ex: com.example.mycorp, has been omitted for simplicity):
/monorepo
    /src
        /main
            /java
                /sharedactivities
                    | PaymentActivities.java
                    | PaymentActivitiesImpl.java
                    | SendEmailActivities.java
                    | SendEmailActivitiesImpl.java
                /backgroundcheck
                    /workflows
                        | BackgroundCheckWorkflow.java
                        | BackgroundCheckWorkflowImpl.java
                    /activities
                        | SsnTraceActivities.java
                        | SsnTraceActivitiesImpl.java
                    /worker
                        | BackgroundCheckWorker.java
                /loanapplication
                    /workflows
                        | LoanApplicationWorkflow.java
                        | LoanApplicationWorkflowImpl.java
                    /activities
                        | CreditCheckActivities.java
                        | CreditCheckActivitiesImpl.java
                    /worker
                        | LoanApplicationWorker.java
            /resources
                | logback.xml
        /test
            /java
                /sharedactivities
                    | PaymentActivitiesTest.java
                    | SendEmailActivitiesTest.java
                /backgroundcheck
                    /workflows
                        | BackgroundCheckWorkflowTest.java
                        | BackgroundCheckWorkflowIntegrationTest.java
                    /activities
                        | SsnTraceActivitiesTest.java
                /loanapplication
                    /workflows
                        | LoanApplicationWorkflowTest.java
                        | LoanApplicationWorkflowIntegrationTest.java
                    /activities
                        | CreditCheckActivitiesTest.java
If you are following along with this guide, your project will look like this:
/backgroundcheck
    /src
        /main
            /java
                /backgroundcheckboilerplate
                    / workers
                        | CloudWorker.java
                        | DevServerWorker.java
                        | SelfHostedWorker.java
                    | BackgroundCheckBoilerplateActivities.java
                    | BackgroundCheckBoilerplateActivitiesImpl.java
                    | BackgroundCheckBoilerplateWorkflow.java
                    | BackgroundCheckBoilerplateWorkflowImpl.java
        /test
            /java
                /backgroundcheckboilerplate
                    | BackgroundCheckBoilerplateActivitiesTest.java
                    | BackgroundCheckBoilerplateWorkflowIntegrationTest.java
                    | BackgroundCheckBoilerplateWorkflowTest.java
Initialize a Java project with Maven
If you have created a similar project structure as noted earlier and are using
Maven as your dependency management tool, ensure that the compiler.source
and compiler.target properties in your pom.xml are set to at least 1.8.
<properties>
  <project.build.sourceEncoding>UTF-8</project.build.sourceEncoding>
  <maven.compiler.source>1.8</maven.compiler.source>
  <maven.compiler.target>1.8</maven.compiler.target>
</properties>
Next, including the following dependencies in the dependencies section of your
pom.xml to install the Temporal SDK and necessary testing packages for this guide.
<dependency>
    <groupId>io.temporal</groupId>
    <artifactId>temporal-sdk</artifactId>
    <version>1.20.1</version>
</dependency>
Finally, run mvn clean compile to perform the first compilation and pull in
the dependencies.
Initialize a Java project with Gradle
If you are using Gradle as your dependency manager, add the Temporal SDK
to the dependencies section of your build.gradle file
dependencies {
    implementation group: 'io.temporal', name: 'temporal-sdk', version: '1.20.1'
}
Next, run ./gradlew build to perform a test build of your application and download
the dependencies.
Boilerplate Workflow Code
In the Temporal Java SDK programming model, a Workflow Definition is defined as an interface and its implementation.
Boilerplate Workflow Interface
import io.temporal.workflow.WorkflowInterface;
import io.temporal.workflow.WorkflowMethod;


// BackgroundCheckReplayWorkflowNonDeterministic is an anti-pattern Workflow Definition
@WorkflowInterface
public interface BackgroundCheckReplayNonDeterministicWorkflow {

  // The Workflow Method within the interface must be annotated with @WorkflowMethod
  @WorkflowMethod
  public String backgroundCheck(String socialSecurityNumber);

}
To designate an interface as a Workflow, annotate the interface declaration
with @WorkflowInterface. Then designate a method within the interface
as the Workflow Method by annotating its method signature with @WorkflowMethod.
The Workflow Method is the method that will be invoked when executing a Workflow.
There can only be one Workflow Method per Workflow Definition.
Boilerplate Workflow Implementation
Now that you've defined your Workflow Interface you can define its implementation.
import io.temporal.activity.ActivityOptions;
import io.temporal.workflow.Workflow;

import java.time.Duration;


public class BackgroundCheckBoilerplateWorkflowImpl implements BackgroundCheckBoilerplateWorkflow {

  // Define the Activity Execution options
  // StartToCloseTimeout or ScheduleToCloseTimeout must be set
  ActivityOptions options = ActivityOptions.newBuilder()
          .setStartToCloseTimeout(Duration.ofSeconds(5))
          .build();

  // Create an client stub to activities that implement the given interface
  private final BackgroundCheckBoilerplateActivities activities =
      Workflow.newActivityStub(BackgroundCheckBoilerplateActivities.class, options);

  @Override
  public String backgroundCheck(String socialSecurityNumber) {
    String ssnTraceResult = activities.ssnTraceActivity(socialSecurityNumber);
    return ssnTraceResult;
  }

}
You define your Workflow Implementation by defining a class that implements the
Workflow Interface.
To have a Workflow call Activities, you'll instantiate an object representing
those Activities. There are various options that can be passed in during creation
time, but Temporal requires that you set either StartToCloseTimeout or ScheduleToCloseTimeout
when creating your Activities stub. You can read more about these options in our documentation
As with regular Java methods, Workflow Methods support the passing of parameters. However, all Workflow Definition parameters must be serializable (using the Jackson JSON Payload Converter).
To request the execution of an Activity, also referred to as an Activity Execution,
call the Activity Method from within the Workflow Method. Use the activities
object that was created in the Workflow Definition to call the Activity Method
along with the any parameters that need to be passed.
A Java-based Workflow Definition can return any serializable output, or raise an exception if one was encountered. We get into the best practices around Workflow parameters, return values, and exceptions in the one of the next sections.
In regards to code organization, we recommend organizing Workflow code the same way you'd organize your standard Java code.
Boilerplate Activity Code
In the Temporal Java SDK programming model, an Activity is defined as an interface and its implementation.
Boilerplate Activity Interface
The BackgroundCheckActivity interface below is an example of a the first part defining an Activity
import io.temporal.activity.ActivityInterface;


// Activity Interfaces must be annotated with @ActivityInterface
@ActivityInterface
// BackgroundCheckActivities is the interface that contains your Activity Definitions
public interface BackgroundCheckBoilerplateActivities {

  // ssnTraceActivity is your custom Activity Definition
  public String ssnTraceActivity(String socialSecurityNumber);

}
To designate an interface as a Activity, annotate the interface declaration
with @ActivityInterface. Then designate a method within the interface
as the Activity Method by annotating its method signature with @ActivityMethod.
The Activity Method is the method that will be invoked when executing a specificy
Activity. There can multiple Activity Methods per Activity Definition.
Boilerplate Activity Implementation
Now that you've defined your Activity Interface you can define its implementation.
public class BackgroundCheckBoilerplateActivitiesImpl implements BackgroundCheckBoilerplateActivities{

  @Override
  public String ssnTraceActivity(String socialSecurityNumber){

    // This is where a call to another service would be made to perform the trace
    // We are simulating that the service that does SSNTrace executed successfully
    // with a passing value being returned

    String result = "pass";
    return result;
  }

}
You define your Activity Implementation by defining a class that implements the
Activity Interface.
As with regular Java methods, Activity Methods support the passing of parameters. However, all Activity parameters must be serializable (using the Jackson JSON Payload Converter).
A Java-based Activity Definition can return any serializable output, or raise an exception if one was encountered. We get into the best practices around Activity parameters, return values, and exceptions in the one of the next sections.
In regards to code organization, we recommend organizing Activity code the same way you'd organize your standard Java code.
Run your Workflow and Activities using a Worker
Now that you've written a Workflow and an Activity, it is time to run a Worker to execute your code. The Worker itself is provided by the Temporal SDK, but your application will include code to configure and run it. When that code executes, the Worker establishes a persistent connection to the Temporal Cluster and begins polling a Task Queue on the Cluster, seeking work to perform.
Since Workers execute your code, any Workflows or Activities you invoke will make no progress unless at least one Worker is running.
Run a dev server Worker
To run a Worker Process with a local development server, define the following steps in code:
- Generate the gRPC stubs necessary to configure a connection to a Temporal Cluster running on localhost using the 'default' namespace
- Initialize a Temporal Client (
WorkflowClient), passing in the gRPC stubs. - Initialize a WorkerFactory, passing in the Temporal Client (
WorkflowClient) - Create a new Worker using the WorkerFactory, passing in the task queue the Worker should listen on.
- Register the application's Workflow and Activities.
- Call start on the Worker.
Temporal recommends keeping Worker code separate from Workflow and Activity code.
import backgroundcheckreplay.BackgroundCheckReplayActivitiesImpl;
import backgroundcheckreplay.BackgroundCheckReplayWorkflowImpl;
import backgroundcheckreplay.BackgroundCheckReplayNonDeterministicWorkflowImpl;
import io.temporal.client.WorkflowClient;
import io.temporal.serviceclient.WorkflowServiceStubs;
import io.temporal.worker.Worker;
import io.temporal.worker.WorkerFactory;


public class DevServerWorker {
  public static void main(String[] args) {

    // Generate the gRPC stubs
    WorkflowServiceStubs service = WorkflowServiceStubs.newLocalServiceStubs();

    // Initialize the Temporal Client, passing in the gRPC stubs
    WorkflowClient client = WorkflowClient.newInstance(service);

    // Initialize a WorkerFactory, passing in the Temporal Client (WorkflowClient)
    WorkerFactory factory = WorkerFactory.newInstance(client);

    // Create a new Worker
    Worker worker = factory.newWorker("backgroundcheck-replay-task-queue-local");

    // Register the Workflow by passing in the class to the worker
    worker.registerWorkflowImplementationTypes(BackgroundCheckReplayWorkflowImpl.class);
    worker.registerWorkflowImplementationTypes(BackgroundCheckReplayNonDeterministicWorkflowImpl.class);

    // Register the Activities by passing in an Activities object used for execution
    worker.registerActivitiesImplementations(new BackgroundCheckReplayActivitiesImpl());

    // Start the Worker
    factory.start();
Run a Temporal Cloud Worker
A Temporal Cloud Worker requires that you specify the following in the Client connection options:
- Temporal Cloud Namespace
- Temporal Cloud Address
- Certificate and private key associated with the Namespace
package backgroundcheckboilerplate.workers;

import java.io.FileInputStream;
import java.io.InputStream;
import io.grpc.netty.shaded.io.netty.handler.ssl.SslContext;
import io.temporal.client.WorkflowClient;
import io.temporal.client.WorkflowClientOptions;
import io.temporal.serviceclient.SimpleSslContextBuilder;
import io.temporal.serviceclient.WorkflowServiceStubs;
import io.temporal.serviceclient.WorkflowServiceStubsOptions;
import io.temporal.worker.Worker;
import io.temporal.worker.WorkerFactory;
import java.lang.System;
import backgroundcheckboilerplate.BackgroundCheckBoilerplateActivitiesImpl;
import backgroundcheckboilerplate.BackgroundCheckBoilerplateWorkflowImpl;
import java.io.IOException;


public class CloudWorker {
  public static void main(String[] args) throws IOException{

    // Get the key and certificate from your environment or local machine
    String clientCertFile = "./certificate.pem";
    String clientCertPrivateKey = "./private.key";

    // Open the key and certificate as Input Streams
    InputStream clientCertInputStream = new FileInputStream(clientCertFile);
    InputStream clientKeyInputStream = new FileInputStream(clientCertPrivateKey);

    // Generate the sslContext using the Client Cert and Key
    SslContext sslContext = SimpleSslContextBuilder.forPKCS8(clientCertInputStream, clientKeyInputStream).build();

    // Specify the host and port of your Temporal Cloud Namespace
	  // Host and port format: namespace.unique_id.tmprl.cloud:port
    String namespace = System.getenv("TEMPORAL_CLOUD_NAMESPACE");
    String port = System.getenv("TEMPORAL_CLOUD_PORT");
    String hostPort = namespace + ".tmprl.cloud:" + port;

    // Specify the IP address, port, and SSL Context for the Service Stubs options
    WorkflowServiceStubsOptions stubsOptions = WorkflowServiceStubsOptions.newBuilder()
            .setSslContext(sslContext)
            .setTarget(hostPort)
            .build();

    // Generate the gRPC stubs using the options provided
    WorkflowServiceStubs service = WorkflowServiceStubs.newServiceStubs(stubsOptions);

    // Specify the namespace in the Client options
    WorkflowClientOptions options = WorkflowClientOptions.newBuilder()
            .setNamespace(namespace)
            .build();

    // Initialize the Temporal Client, passing in the gRPC stubs and Client optins
    WorkflowClient client = WorkflowClient.newInstance(service, options);

    // Initialize a WorkerFactory, passing in the Temporal Client (WorkflowClient)
    WorkerFactory factory = WorkerFactory.newInstance(client);

    // Create a new Worker
    Worker worker = factory.newWorker("backgroundcheck-tasks");

    // Register the Workflow by passing in the class to the worker
    worker.registerWorkflowImplementationTypes(BackgroundCheckBoilerplateWorkflowImpl.class);

    // Register the Activities by passing in an Activities object used for execution
    worker.registerActivitiesImplementations(new BackgroundCheckBoilerplateActivitiesImpl());

    // Start the Worker
    factory.start();
  }
}
To run a Temporal Cloud Worker, you'll change some parameters in your Client connection code, such as updating the namespace and gRPC endpoint. You'll use:
- The Temporal Cloud Namespace Id.
- The Namespace's gRPC endpoint.
The endpoint uses this format
(namespace.unique_id.tmprl.cloud:port). - Paths to the SSL certificate (.pem) and private key (.key) registered to your Namespace and stored on your Worker's file system.
Copy the Namespace Id and the gRPC endpoint from the Namespace detail Web page on Temporal Cloud Namespaces. Click on a Namespace name to open the Namespace details.
For information about managing and generating client certificates for Temporal Cloud, see How to manage certificates in Temporal Cloud.
For information about configuring TLS to secure inter- and intra-network communication for a Temporal Cluster, see Temporal Customization Samples.
Run a Self-hosted Worker
To deploy a self-hosted Worker to your Docker environment, you need to configure your Worker with the appropriate IP address and port.
Confirm network
The default docker-compose.yml file in the temporalio/docker-compose repo has the Temporal Server exposed on port 7233 on the temporal-network.
services:
  # ...
  temporal:
    container_name: temporal
    # ...
    networks:
      - temporal-network
    ports:
      - 7233:7233
    # ...
  # ...
If you are using a different or customized docker compose file, you can see the available networks by using the following command:
docker network ls
Confirm IP address
Get the IP address of the Docker network that the containers are using.
To do that, first inspect the network:
docker network inspect temporal-network
Look for the container named temporal.
Example output:
[
  {
    "Name": "temporal-network",
    // ...
    "Containers": {
      // ...
      "53cf62f0cc6cfd2a9627a2b5a4c9f48ffe5a858f0ef7b2eaa51bf7ea8fd0e86f": {
        "Name": "temporal",
        // ...
        "IPv4Address": "172.18.0.4/16"
        // ...
      }
      // ...
    }
    // ...
  }
]
Copy the IP address part.
Set IP address and port in the Service Stubs Options and the Namespace in the Temporal Client options.
import backgroundcheckreplay.BackgroundCheckReplayActivitiesImpl;
import backgroundcheckreplay.BackgroundCheckReplayWorkflowImpl;
import backgroundcheckreplay.BackgroundCheckReplayNonDeterministicWorkflowImpl;
import io.temporal.client.WorkflowClient;
import io.temporal.client.WorkflowClientOptions;
import io.temporal.serviceclient.WorkflowServiceStubs;
import io.temporal.serviceclient.WorkflowServiceStubsOptions;
import io.temporal.worker.Worker;
import io.temporal.worker.WorkerFactory;


public class SelfHostedWorker {
  public static void main(String[] args) {

    // Specify the IP address and port for the Service Stubs options
    WorkflowServiceStubsOptions stubsOptions = WorkflowServiceStubsOptions.newBuilder()
            .setTarget("mycluster.example.com:7233")
            .build();

    // Generate the gRPC stubs using the options provided
    WorkflowServiceStubs service = WorkflowServiceStubs.newServiceStubs(stubsOptions);

    // Specify the namespace in the Client options
    WorkflowClientOptions options = WorkflowClientOptions.newBuilder()
            .setNamespace("backgroundcheck_namespace")
            .build();

    // Initialize the Temporal Client, passing in the gRPC stubs and Client optins
    WorkflowClient client = WorkflowClient.newInstance(service, options);

    // Initialize a WorkerFactory, passing in the Temporal Client (WorkflowClient)
    WorkerFactory factory = WorkerFactory.newInstance(client);

    // Create a new Worker
    Worker worker = factory.newWorker("backgroundcheck-tasks");

    // Register the Workflow by passing in the class to the worker
    worker.registerWorkflowImplementationTypes(BackgroundCheckReplayWorkflowImpl.class);

    // Register the Activities by passing in an Activities object used for execution
    worker.registerActivitiesImplementations(new BackgroundCheckReplayActivitiesImpl());

    // Start the Worker
    factory.start();
  }
Add a Docker file to the root of your Background Check application project.
Name the file dockerfile, with no extensions, and add the following configuration:
# Use an official image of OpenJDK as the base image
FROM openjdk:11-jre-slim

# Set the working directory in the container
WORKDIR /app

# Copy the Maven project files to the container
COPY src src/
COPY pom.xml .

# Build the Maven project to a JAR file
RUN apt-get update && \
    apt-get install -y maven && \
    mvn clean compile

# Set the entry point for the application
CMD ["mvn", "exec:java", "-Dexec.mainClass='backgroundcheck.workers.SelfHostedWorker']
Make sure the Java version matches the one you used when developing your
application and is version 1.8 or greater.
Then build the Docker image using the following command:
docker build . -t backgroundcheck-worker-image:latest
Now run the Worker on the same network as the Temporal Cluster containers using the following command:
docker run --network temporal-network backgroundcheck-worker-image:latest
Start Workflow using the CLI
You can use the Temporal CLI to start a Workflow whether you are using a local development server, Temporal Cloud, or are in a self-hosted environment. However, you need to provide additional options to the command when operating with the Temporal Cloud or self-hosted environments.
Local dev Server
Starting the Workflow with Temporal CLI
Use the Temporal CLI temporal workflow start command to start your Workflow.
temporal workflow start \
 --task-queue backgroundcheck-boilerplate-task-queue \
 --type BackgroundCheckBoilerplateWorkflow \
 --input '"555-55-5555"' \
 --namespace backgroundcheck_namespace
For more details, see the temporal workflow start command API reference.
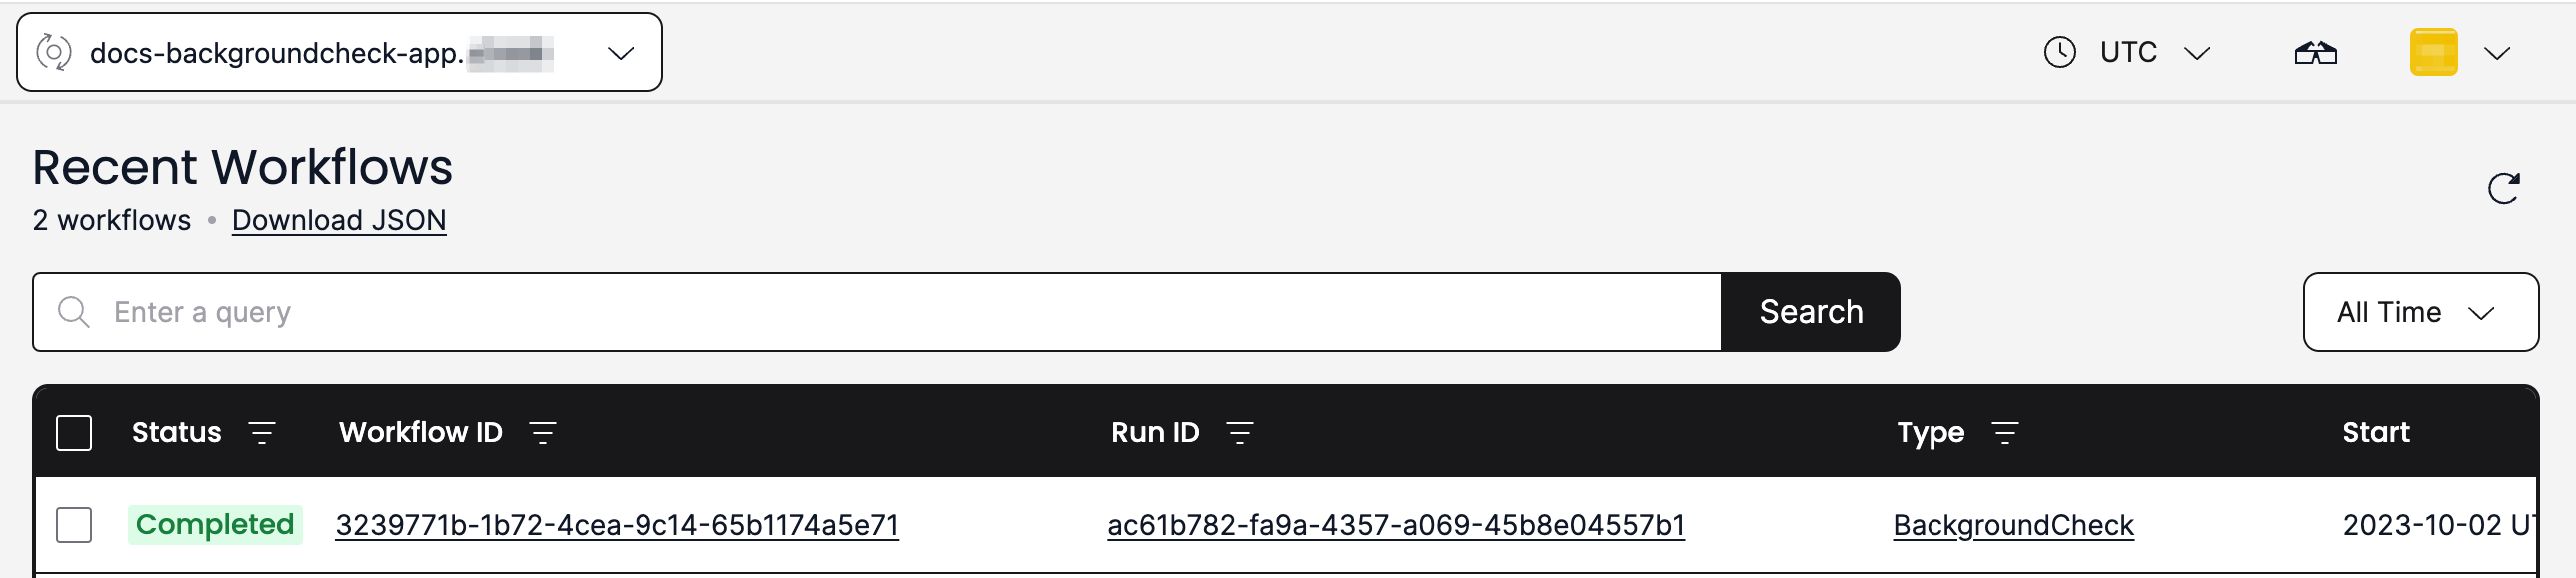
After you start the Workflow, you can see it in the Temporal Platform. Use the Temporal CLI or the Temporal Web UI to monitor the Workflow's progress.
List Workflows
Use the 'temporal workflow list` command to list all of the Workflows in the Namespace:
temporal workflow list \
 --namespace backgroundcheck_namespace
View in Web UI
You can also use the Web UI to see the Workflows associated with the Namespace.
The local development server starts the Web UI at http://localhost:8233.
When you visit for the first time, the Web UI directs you to http://localhost:8233/namespaces/default/workflows.
Use the Namespace dropdown to select the project Namespace you created earlier.
Web UI Namespace selection
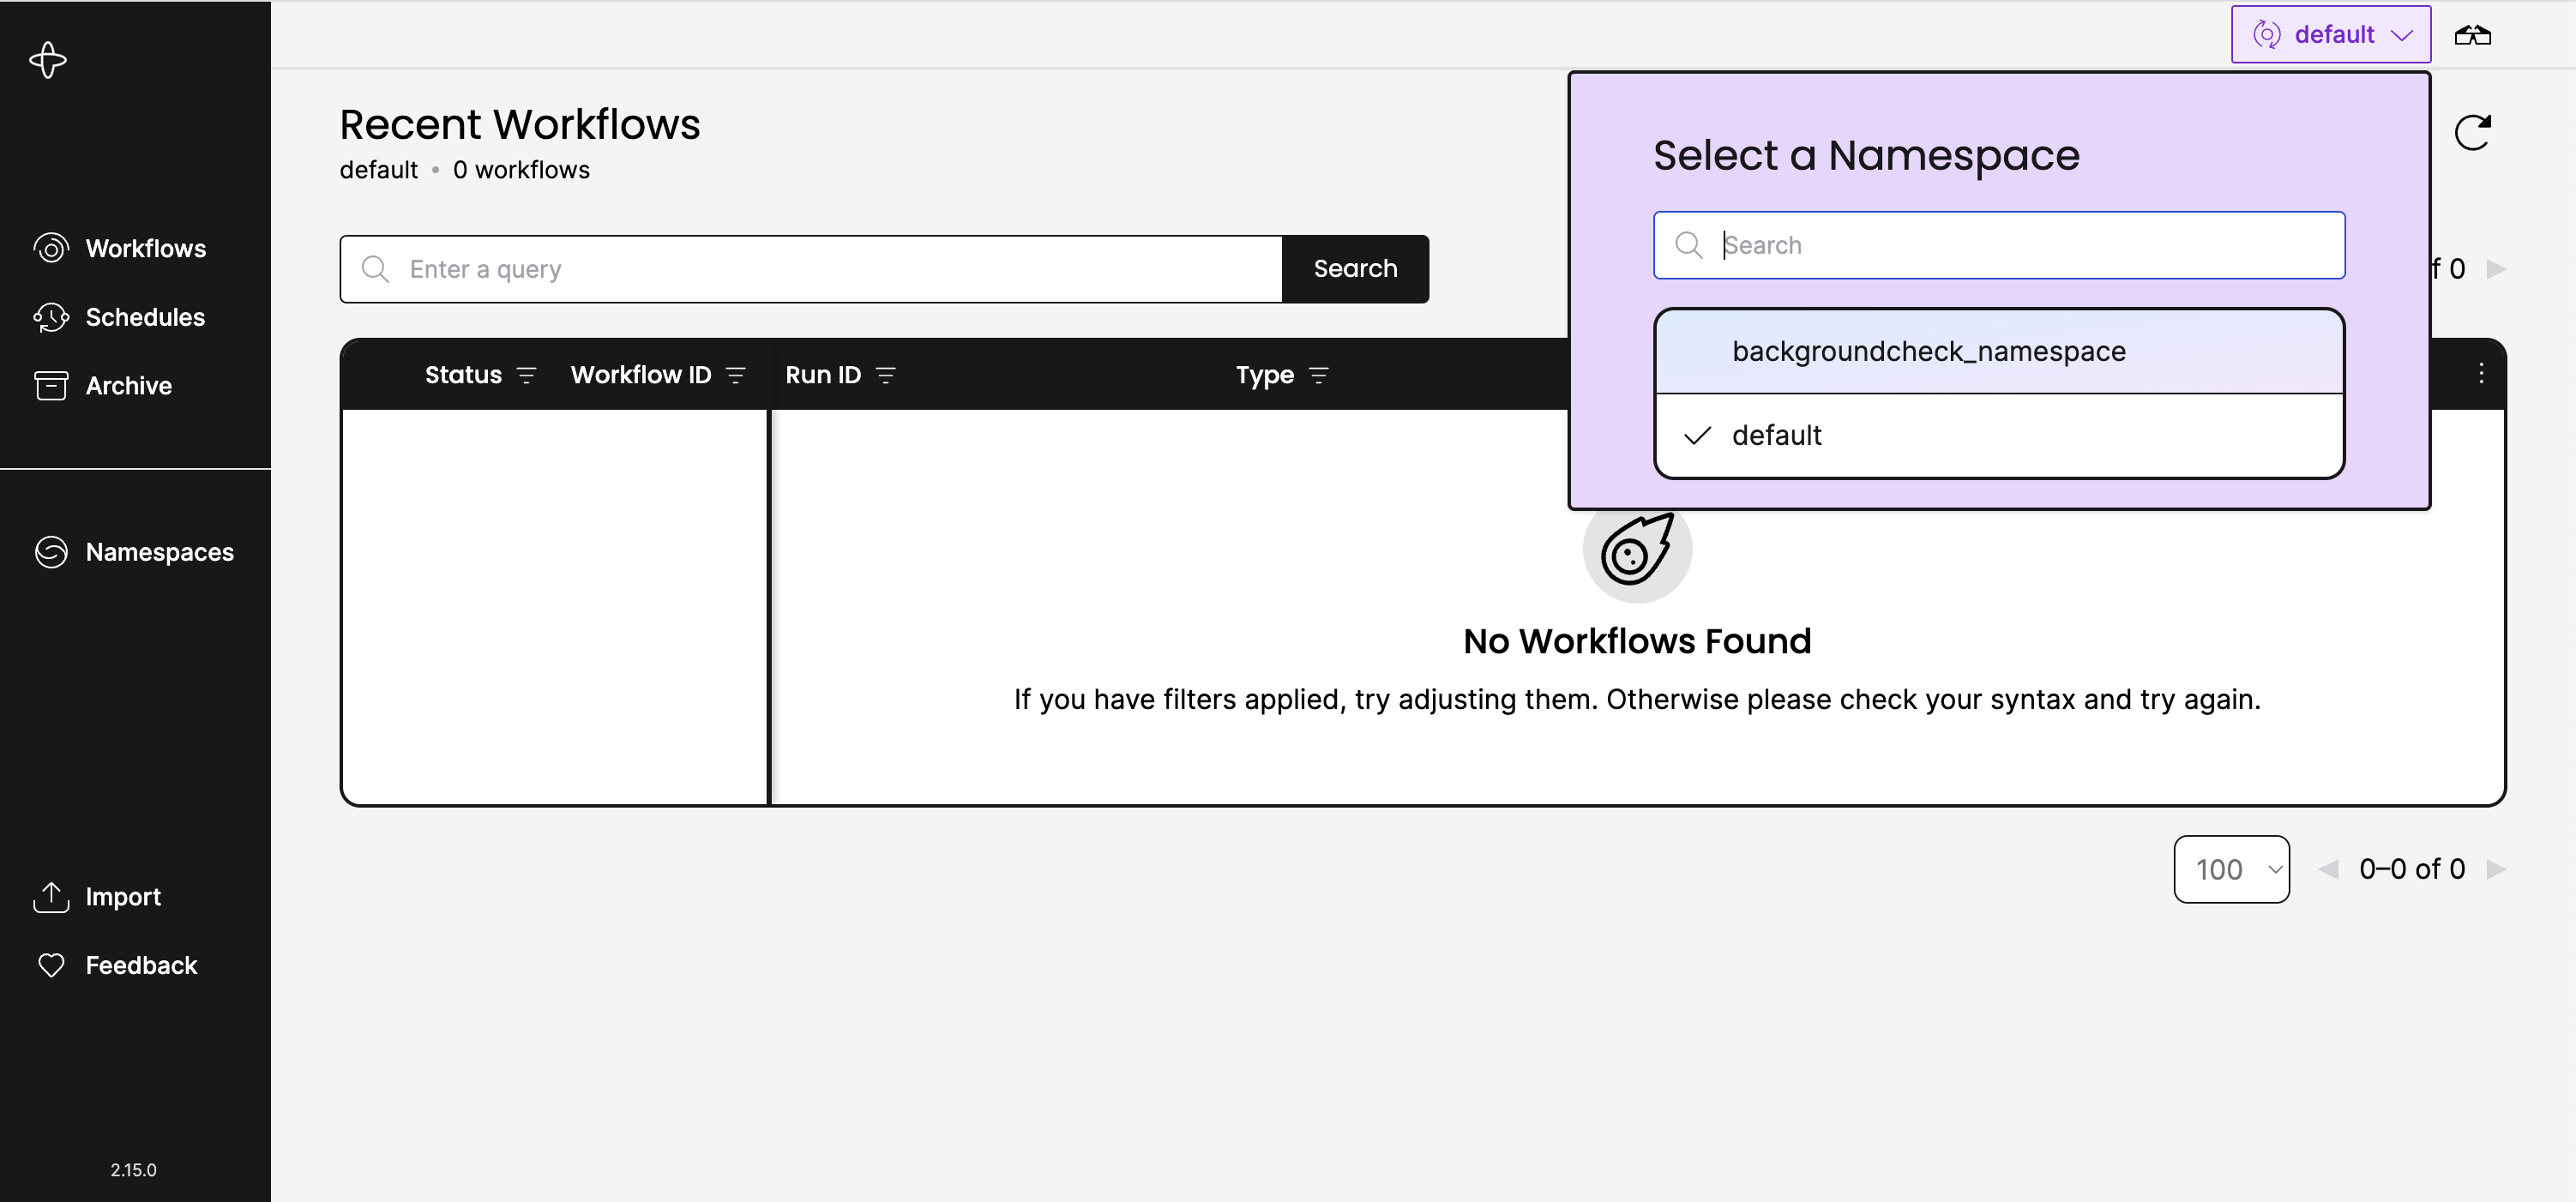
You should now be at http://localhost:8233/namespaces/backgroundcheck_namespace/workflows.
Temporal Cloud
Starting the Workflow with Temporal CLI
Run the temporal workflow start command, and make sure to specify the certificate and private key arguments.
temporal workflow start \
 --task-queue backgroundcheck-boilerplate-task-queue-cloud \
 --type BackgroundCheckBoilerplateWorkflow \
 --tls-cert-path ca.pem \
 --tls-key-path ca.key \
 --input '"555-55-5555"' \
 --namespace <namespace>.<account-id> \
 --address <namespace>.<account-id>.tmprl.cloud:<port>
Make sure that the certificate path, private key path, Namespace, and address argument values match your project.
Use environment variables as a way to quickly switch between a local dev server and Temporal Cloud, for example.
You can customize the environment names to be anything you want.
# set Cloud env variables
temporal env set cloud.namespace <namespace>.<account-id>
temporal env set cloud.address <namespace>.<account-id>.tmprl.cloud:<port>
temporal env set cloud.tls-cert-path ca.pem
temporal env set cloud.tls-key-path ca.key
# set local env variables
temporal env set local.namespace <namespace>
In this way, you can just provide a single --env command option when using the CLI rather than specifying each connection option in every command.
temporal workflow start \
 # ...
 --env cloud \
 # ...
List Workflows
Run the temporal workflow list command, and make sure to specify the certificate and private key arguments.
temporal workflow list \
 --tls-cert-path ca.pem \
 --tls-key-path ca.key \
 --namespace <namespace>.<account-id> \
 --address <namespace>.<account-id>.tmprl.cloud:<port>
View in Web UI
Visit the Workflows page of your Cloud Namespace. The URL will look something like the following:
https://cloud.temporal.io/namespaces/<namespace>.<account-id>/workflows
View Workflows in the Cloud UI
Self-hosted
Starting the Workflow with Temporal CLI
Use your Temporal CLI alias to run the temporal workflow start command and start your Workflow.
temporal_docker workflow start \
 --task-queue backgroundcheck-boilerplate-task-queue-self-hosted \
 --type BackgroundCheckBoilerplateWorkflow \
 --input '"555-55-5555"' \
 --namespace backgroundcheck_namespace
List Workflows
Using your Temporal CLI alias, run the temporal workflow list command.
This command lists the Workflows Executions within the Namespace:
temporal_docker workflow list \
 --namespace backgroundcheck_namespace
View in the Web UI
When you visit for the first time, the Web UI directs you to http://localhost:8233/namespaces/default/workflows.
Use the Namespace dropdown to select the project Namespace you created earlier.
You should now be at http://localhost:8080/namespaces/backgroundcheck_namespace/workflows.
Add a testing framework
The Temporal Java SDK provides a test framework to facilitate Workflow unit and integration testing.
The test framework provides the TestWorkflowEnvironment and TestActivityEnvironment classes which includes an in-memory implementation
of the Temporal service that supports automatic time skipping. This allows you to
easily test long-running Workflows in seconds, without having to change your Workflow code.
You can use the provided testing environments with a Java unit testing framework of your choice, such as JUnit. This guide will use JUnit 5.
Setup testing dependencies
To start using the Java SDK test framework, you need to add io.temporal:temporal-testing
as a dependency to your project:
<dependency>
    <groupId>io.temporal</groupId>
    <artifactId>temporal-testing</artifactId>
    <version>1.20.1</version>
    <scope>test</scope>
</dependency>
<dependency>
    <groupId>org.junit.jupiter</groupId>
    <artifactId>junit-jupiter</artifactId>
    <version>5.5.2</version>
    <scope>test</scope>
</dependency>
<dependency>
    <groupId>org.mockito</groupId>
    <artifactId>mockito-junit-jupiter</artifactId>
    <version>5.3.1</version>
    <scope>test</scope>
</dependency>
<dependency>
    <groupId>org.mockito</groupId>
    <artifactId>mockito-core</artifactId>
    <version>5.1.1</version>
    <scope>test</scope>
</dependency>
testImplementation group: 'io.temporal', name: 'temporal-testing', version: '1.20.1'
testImplementation group: 'junit', name: 'junit-jupiter', version: '5.5.2'
testImplementation group: 'org.mockito', name: 'mockito-core', version: '5.1.1'
testImplementation group: 'org.mockito', name: 'mockito-junit-jupiter', version: '5.3.1'
Make sure to set the version that matches your dependency version of the Temporal Java SDK.
Testing Activities
Temporal provides the TestActivityEnvironment and TestActivityExtension classes
to allow for testing Activities outside the scope of a Workflow. Testing
Activities is similar to testing non-Temporal java code.
Some examples of things an Activity can be tested for are:
- Exceptions thrown when invoking the Activity Execution.
- Exceptions thrown when checking for the result of the Activity Execution.
- Activity return values. Check to ensure the return value is expected.
This example asserts that the expected value was returned by the invocation of the Activity.
import static org.junit.jupiter.api.Assertions.assertEquals;
import org.junit.jupiter.api.Test;
import org.junit.jupiter.api.extension.RegisterExtension;
import io.temporal.testing.TestActivityExtension;


public class BackgroundCheckBoilerplateActivitiesTest {

  // Use JUnit Extensions to simplify the creation of the test environment.
  // This creates an environment and registers Activities to a Worker for testing.
  // If you would rather set this up yourself, look into TestActivityEnvironment
  @RegisterExtension
  public static final TestActivityExtension activityExtension = TestActivityExtension.newBuilder()
      .setActivityImplementations(new BackgroundCheckBoilerplateActivitiesImpl()).build();

  // Test the Activity in isolation from the Workflow
  @Test
  public void testSsnTraceActivity(BackgroundCheckBoilerplateActivities activities) {
    String socialSecurityNumber = "111-22-3333";

    // Run the Activity in the test environment
    String result = activities.ssnTraceActivity(socialSecurityNumber);

    // Check for the expected return value
    assertEquals("pass", result);
  }

}
Temporal provides the TestActivityExtension class to simplify the creation of
the test environment. Using this extension you provide your Activity
to register with a Worker created by the testing framework to be used during testing.
The extension provides a a stubbed Activity object to each test as well as
manage the lifecycle of the test environment.
If you require more granular control of the test environments, you can manually create
and destroy all these parts in methods annotated with @BeforeEach and @AfterEach
as defined by JUnit.
You annotate the method with @Test and test the results of the Activity via assertions.
Testing Workflows
Temporal provides the TestWorkflowEnvironment and TestWorkflowExtension classes
to allow for testing Workflows. There are two ways to test Workflows; the first
is to test the Workflow code without invoking the real Activities by mocking
the Workflow's Activities and the second is to test the Workflow and its Activities
in their entirety. This section will focus on the first scenario while a following
section will cover the later.
Testing your Workflows without invoking your Activities can be useful for testing Workflow specific logic without having to worry about the Activity invocation producing a side-effect or having any Activity downstream dependency, such as a microservice, be available during the duration of your testing.
As for the actual testing code, testing Workflows is similar to testing non-Temporal java code.
Some examples of things an Workflow can be tested for are:
- Exceptions thrown when invoking the Workflow Execution.
- Exceptions thrown when checking for the result of the Workflow Execution.
- Workflow return values. Check to ensure the return value is expected.
We can also perform a Workflow Replay test, and we'll provide detailed coverage of this topic in another section.
import static org.junit.jupiter.api.Assertions.assertEquals;
import static org.mockito.Mockito.mock;
import static org.mockito.Mockito.when;
import static org.mockito.Mockito.withSettings;
import org.junit.jupiter.api.Test;
import org.junit.jupiter.api.extension.RegisterExtension;
import io.temporal.testing.TestWorkflowEnvironment;
import io.temporal.testing.TestWorkflowExtension;
import io.temporal.worker.Worker;


public class BackgroundCheckBoilerplateWorkflowTest {

  // Use JUnit Extensions to simplify the creation of the test environment.
  // This creates an environment and registers the Workflow to a Worker for testing.
  // If you would rather set this up yourself, look into TestWorkflowEnvironment
  @RegisterExtension
  public static final TestWorkflowExtension testWorkflowExtension = TestWorkflowExtension
      .newBuilder().setWorkflowTypes(BackgroundCheckBoilerplateWorkflowImpl.class)
      .setDoNotStart(true).build();

  @Test
  public void testSuccessfulBackgroundCheckBoilerplateWithMocks(TestWorkflowEnvironment testEnv,
      Worker worker, BackgroundCheckBoilerplateWorkflow workflow) {

    // Create a mock object of your Activities
    BackgroundCheckBoilerplateActivities mockedActivities =
        mock(BackgroundCheckBoilerplateActivities.class, withSettings().withoutAnnotations());

    // Specify what value should be returned when a specific Activity is invoked.
    // Your Activity must have the same method name here as it would within your Workflow
    when(mockedActivities.ssnTraceActivity("555-55-5555")).thenReturn("pass");

    // Register the Workflow's Activities with the Worker provided by the Extension
    worker.registerActivitiesImplementations(mockedActivities);

    // Start the test environment
    testEnv.start();

    // Request execution of the backgroundCheck Workflow
    // This will execute your Workflow, calling the Mocked Activities in place
    // of your actual implementation of the Activities.
    String pass_output = workflow.backgroundCheck("555-55-5555");

    assertEquals("pass", pass_output);

  }
}
As for the code, first you register your Workflow with the TestWorkflowExtension.
This extension allows you to pass in a TestWorklowEnvironment, Worker, and
an instance of your Workflow into your tests. To test your Workflow using mocked
activities you then create a mocked object of your Activity class to be used for
testing. Then you mock the Activity method, in this case ssNTraceAcvitity, so
that when when a specific value is passed to the Activity it returns a specific result.
Then the mocked object is used to register the mocked Activities with the Worker
being used in the test environment. Then you start the test environment, invoke
your Workflow as usual, passing in the specific value for your Activity so that
the Activity returns the result you are expecting. Then you assert that the
results are what you expected.
Doiong this allows you to test the Workflow code without having to worry about actually invoking the Activity.
Testing Workflow and Activity together (Integration Testing)
Temporal provides the TestWorkflowEnvironment and TestWorkflowExtension classes
to allow for testing Workflows. There are two ways to test Workflows; the first
is to test the Workflow code without invoking the real Activities by mocking
the Workflow's Activities and the second is to test the Workflow and its Activities
in their entirety. This section will focus on the second scenario while a previous
section will cover the first.
As for the actual testing code, testing Workflows is similar to testing non-Temporal java code.
Some examples of things an Workflow can be tested for are:
- Exceptions thrown when invoking the Workflow Execution.
- Exceptions thrown when checking for the result of the Workflow Execution.
- Workflow return values. Check to ensure the return value is expected.
We can also perform a Workflow Replay test, and we'll provide detailed coverage of this topic in another section.
import static org.junit.jupiter.api.Assertions.assertEquals;
import org.junit.jupiter.api.Test;
import org.junit.jupiter.api.extension.RegisterExtension;
import io.temporal.testing.TestWorkflowEnvironment;
import io.temporal.testing.TestWorkflowExtension;
import io.temporal.worker.Worker;


public class BackgroundCheckBoilerplateWorkflowIntegrationTest {

  // Use JUnit Extensions to simplify the creation of the test environment.
  // This creates an environment and registers the Workflow to a Worker for testing.
  // If you would rather set this up yourself, look into TestWorkflowEnvironment
  @RegisterExtension
  public static final TestWorkflowExtension testWorkflowExtension = TestWorkflowExtension
      .newBuilder().setWorkflowTypes(BackgroundCheckBoilerplateWorkflowImpl.class).setDoNotStart(true).build();

  @Test
  public void testSuccessfulBackgroundCheckBoilerplate(TestWorkflowEnvironment testEnv, Worker worker,
      BackgroundCheckBoilerplateWorkflow workflow) {

    // Register the Workflow's Activities with the Worker provided by the Extension
    worker.registerActivitiesImplementations(new BackgroundCheckBoilerplateActivitiesImpl());

    // Start the test environment
    testEnv.start();

    // Request execution of the backgroundCheck Workflow
    // This will execute your entire Workflow, along with every Activity the
    // Workflow calls
    String output = workflow.backgroundCheck("555-22-3333");

    // Check for the expected return value
    assertEquals("pass", output);
  }
}
This example tests a complete Workflow by invoking the Activities the Workflow calls. This is, in reality, an integration test. Integration testing is useful for ensuring the complete success of your entire Workflow. However, note that any downstream dependencies of the Activities, such as microservice or databases, must be online for the testing. Furthermore, any mutations the Activity would typically perform as part of its regular execution will be performed as part of testing. We recommend either having an entirely separate testing environment for testing your Workflows, or testing your Workflow and Activity code in isolation, as detailed in prior sections in this guide.
As for the code, first you register your Workflow with the TestWorkflowExtension.
This extension allows you to pass in a TestWorkflowEnvironment, Worker, and
an instance of your Workflow into your tests. From there you register your Activities
with the Worker, start the test environment, and invoke your Workflow as you would
typically. Then you assert that the results are what you expected.